Enhance the Security of Your Network Attached Storage (NAS)?
Introduction:
When you’re using a network attached storage (NAS) in your business or home, storing important data on it, security becomes an important practice.
And having a secure and controlled NAS becomes as important as the data itself.
In this guide, I’ll go through some steps to make sure Your NAS is Secure.
I’ll be using Qnap NAS for this guide, however, the same concepts can be applied to other NAS providers.
1) Securing Data At Rest:
Securing data at rest is encrypting your data when it is stored on your NAS Hard Drives or Volumes, for this, you need to implement Hard Drives encryption.
To enable Hard Drive Encryption on Qnap NAS:
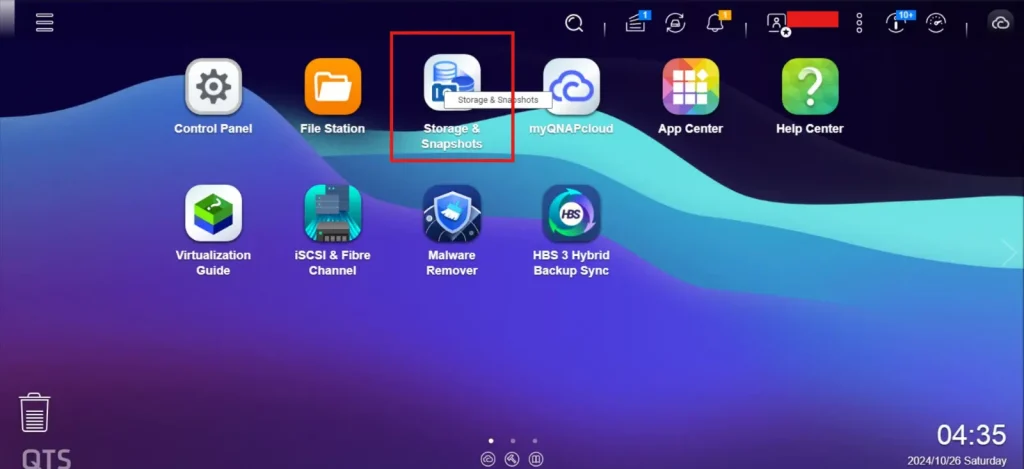
Open “Storage & Snapshots” application on your Qnap Web management:
You can enable volume encryption when you are creating a volume or storage pool.
* please note that you cannot encrypt a volume after it has been created (you cannot encrypt your existing Volumes)
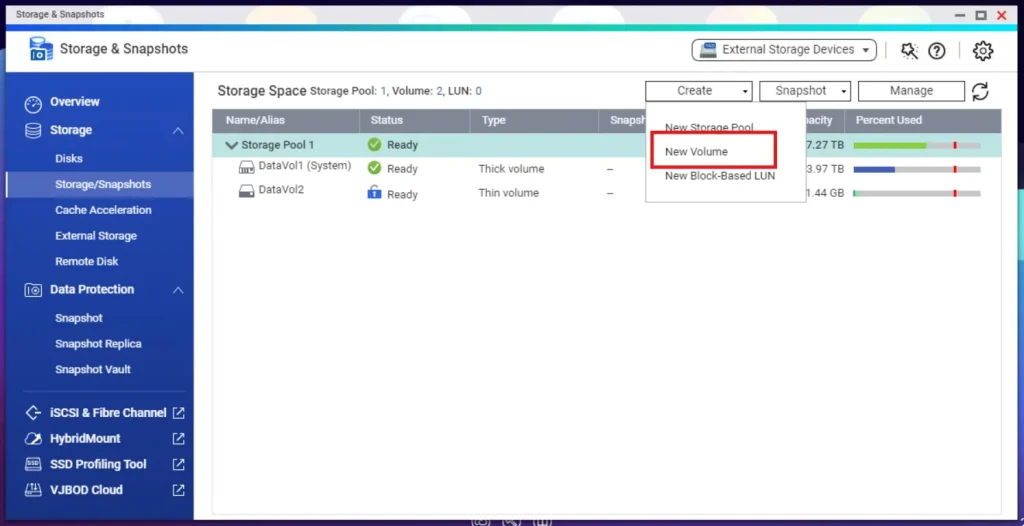
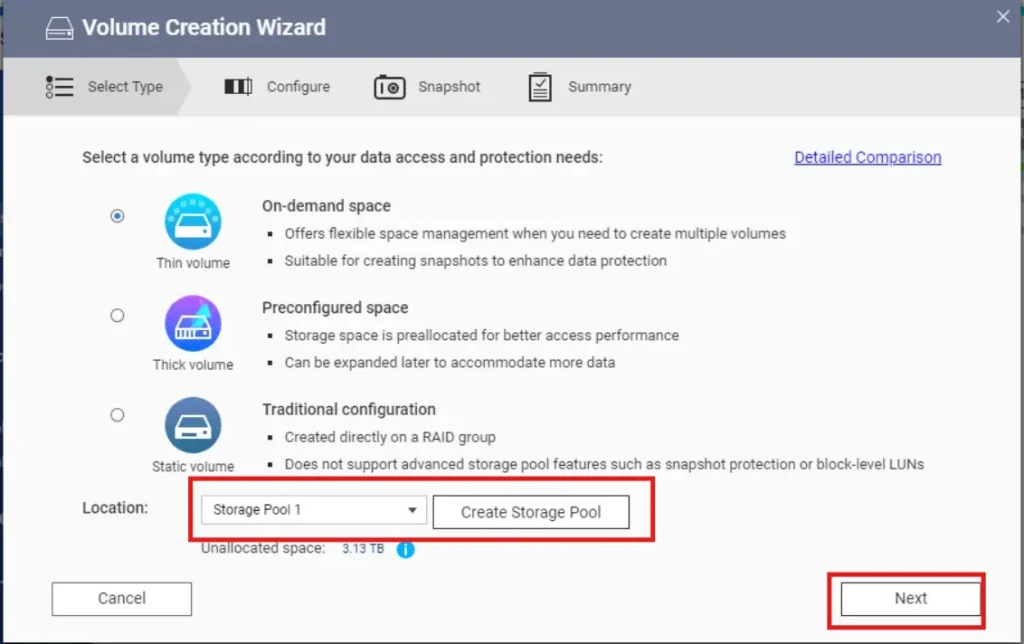
Then, the volume creation wizard will open, choose the location of the volume then click “next”:
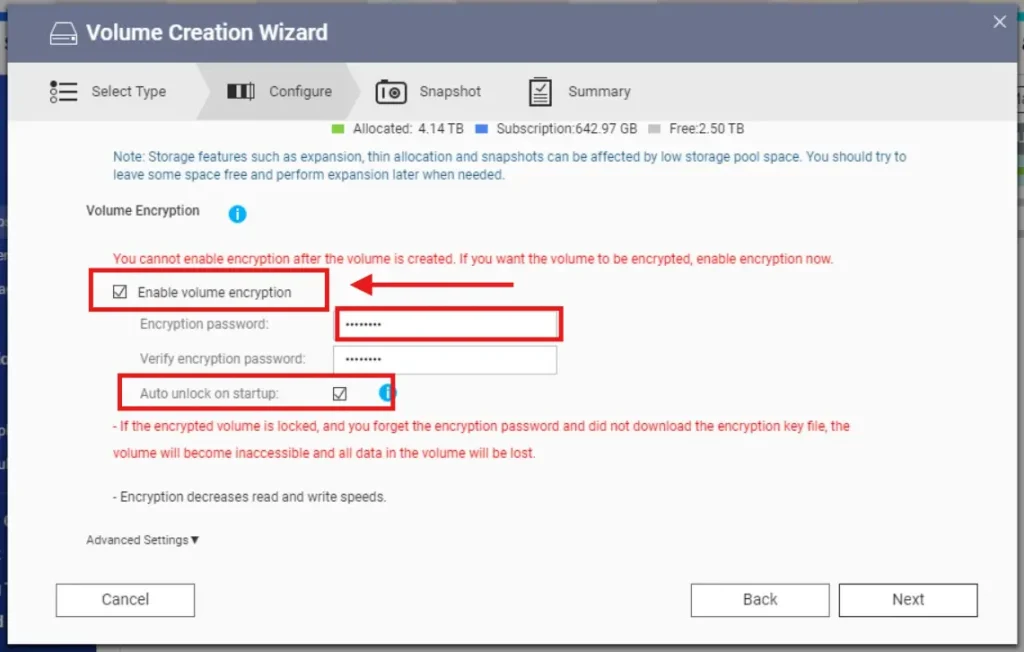
In the configure tab, choose a name for the new volume, and adjust the size, then scroll down to the encryption part.
Make sure the option “Enable volume encryption” is checked, enter a password for encryption.
For the option “Auto unlock on startup”, you can check it so you don’t need to enter the password every time you turn on your NAS:
On the summary, review your configurations, then click “finish”:
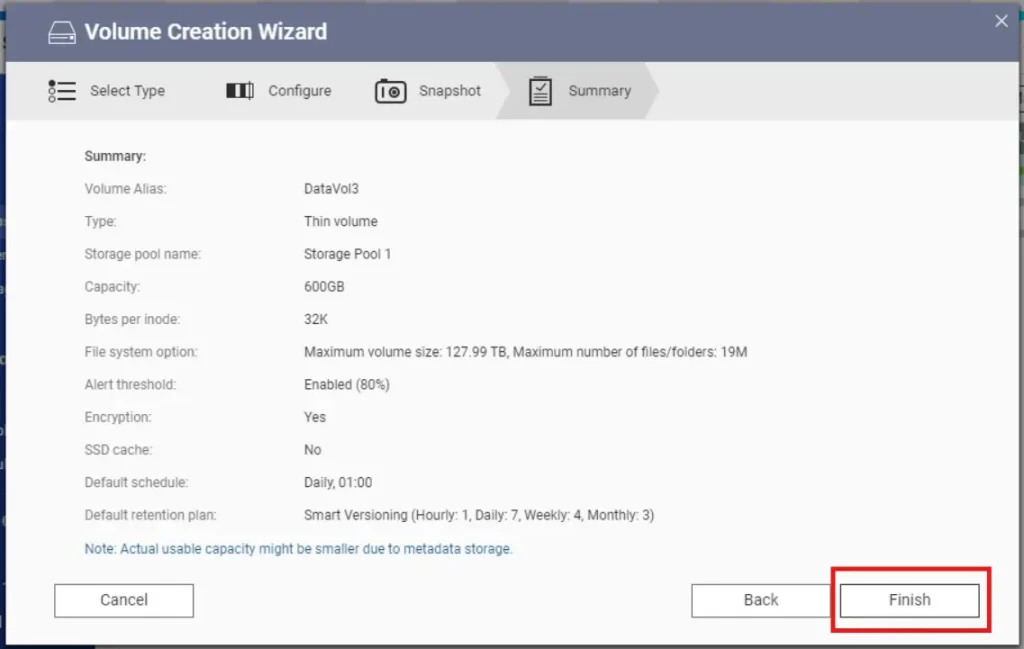
After the volume is created, it will automatically download the encryption key, make sure to save it somewhere along with the encryption password.
2) Disable Unnecessary Network Protocols:
NAS supports multiple network protocols like file sharing protocols and management access protocols.
Depending on your requirements, you might need some of them, but for the other protocols that you usually don’t need, it’s better to disable them.
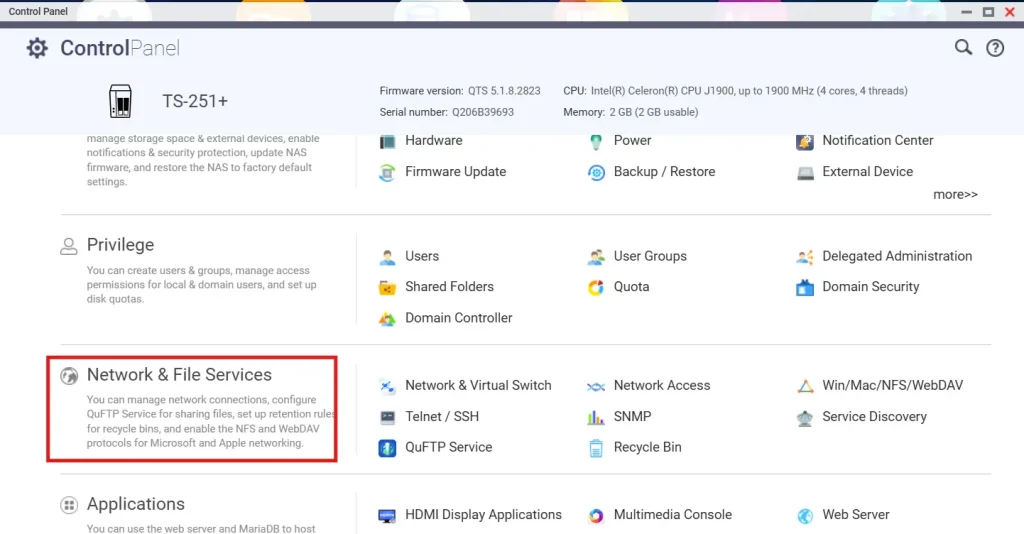
On you Qnap Control panel, open “Network & File Services” Section:
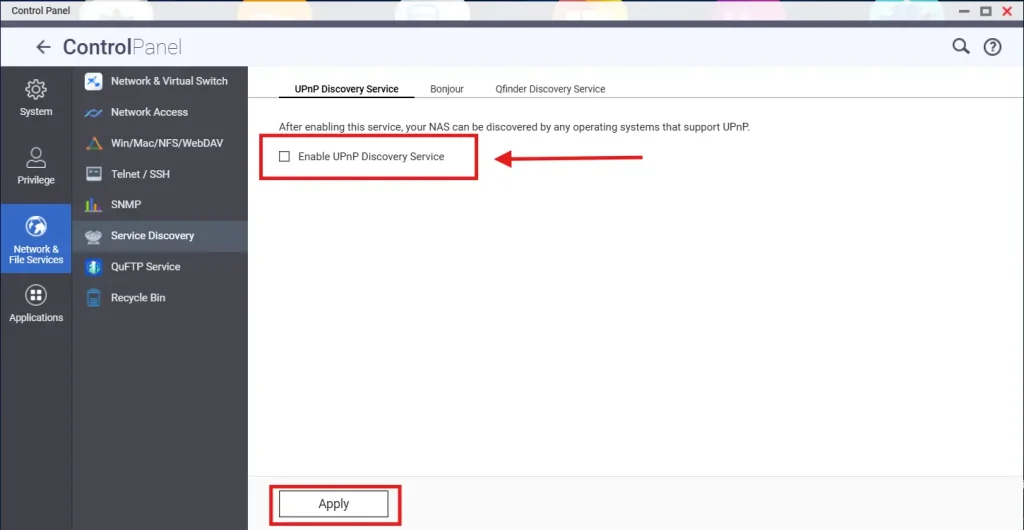
If you don’t use UPnP protocol, make sure to disable it:
Open the “Service Discovery” tab and make sure the option “Enable UPnP Discovery Service” is Disabled, then click “Apply”:
Also, if you don’t have devices that use Bonjour, Make Sure to Disable it from Bonjour tab, then click “Apply”:
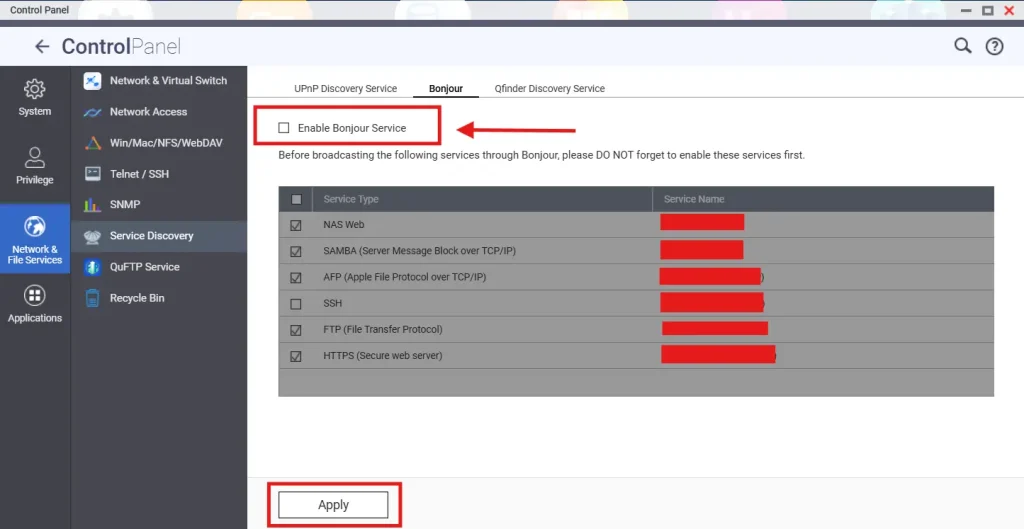
I recommend keeping Qfinder Discovery Service Enable, if you ever missed up your NAS Access, you can find it using Qfinder Pro
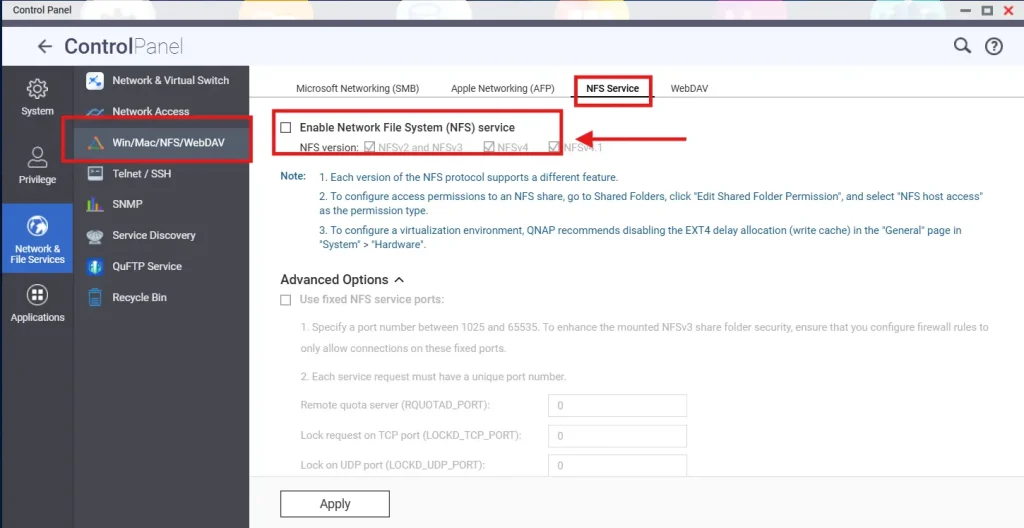
For File Sharing Protocols, if you don’t have Linux Machines accessing your NAS, it’s better to Disable NFS Protocol,
Same goes for MacOs (Apple Networking), and Windows (Microsoft Networking).
On “Network & File Service Section” Open the tab “Win/Mac/NFS/WebDaV” >> “NFS Service”.
Uncheck the option “Enable Network File System (NFS) service”:
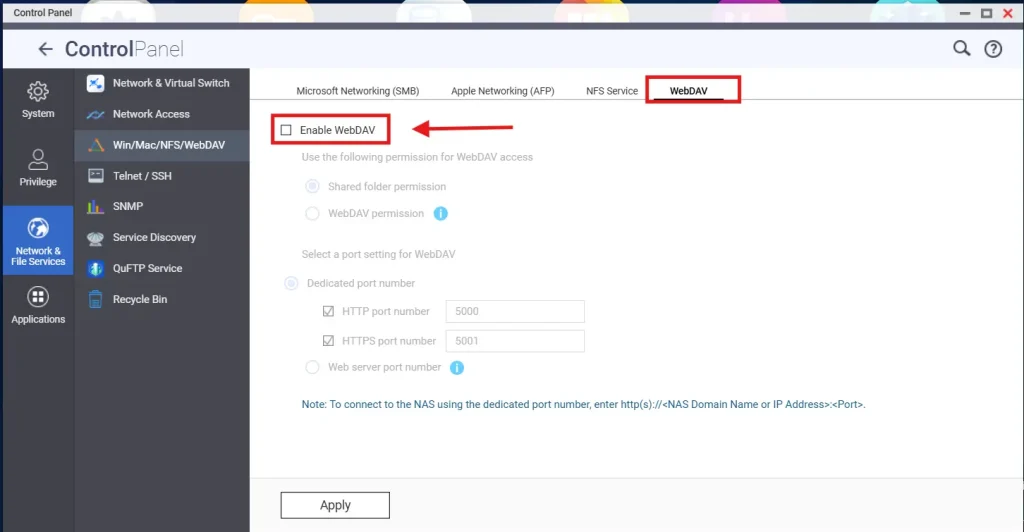
Then head to “WebDaV” tab and disable it:
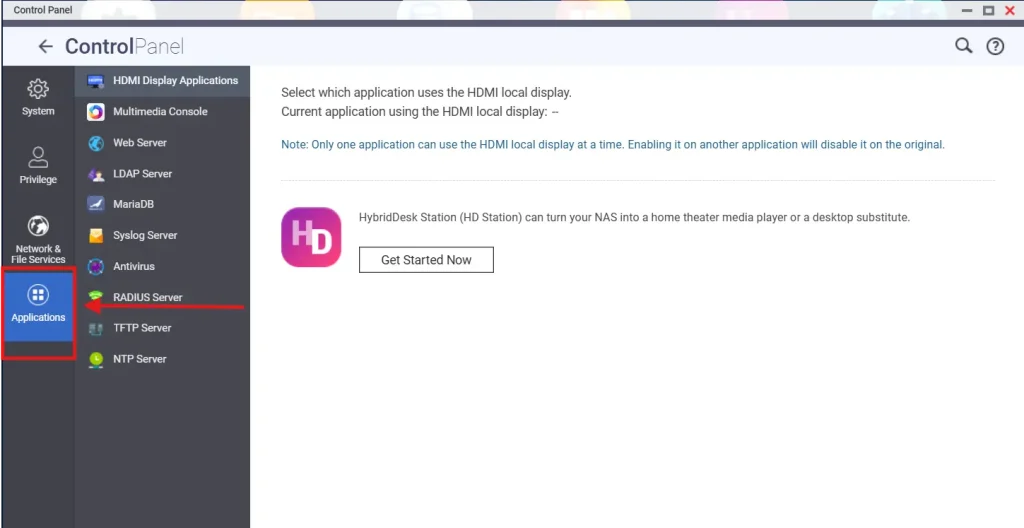
You can also check the Applications, that have access to your Network from the “Applications” Section, and you can disable them accordingly:
3) Enable Antivirus and Security:
Most NAS providers offer or support Antivirus and security applications.
Mostly, These Antivirus Applications come with schedule scanning functionality.
For example, Qnap NAS supports multiple Antivirus applications.
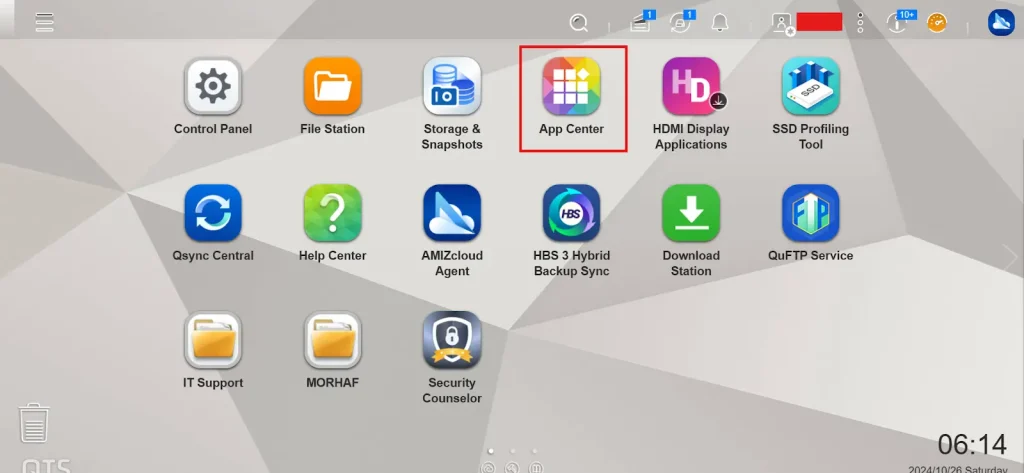
Open the app center on your Qnap NAS:
Then open “Security” Section:
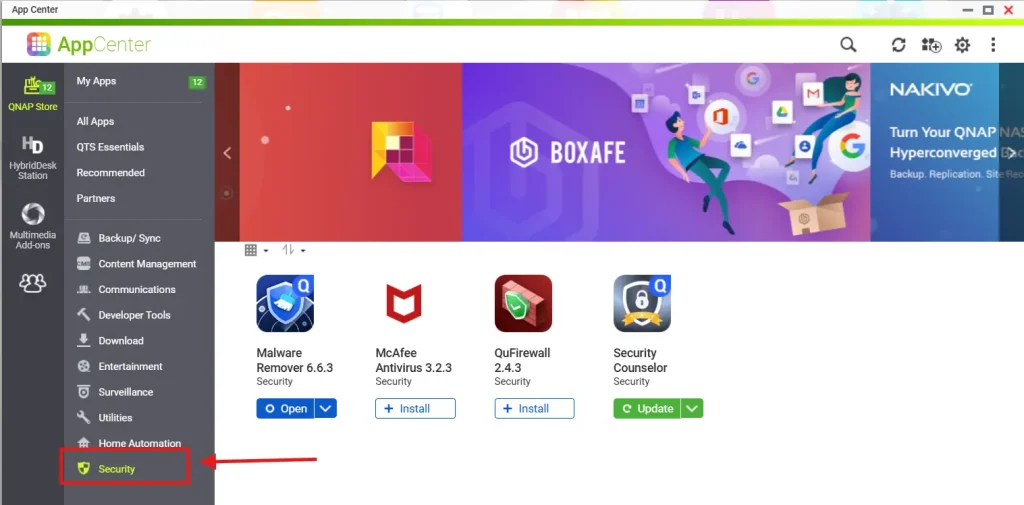
Here you can choose which Antivirus you would like to install, then install it and you can schedule daily, weekly and other scanning frequency.
Additionally, you can use Security Counselor, this application scans your NAS and gives you recommendations for security practices.
4) Apply Network Access Control:
If you use your NAS in a Local Area Network, you can Apply an access control list (ACL) to your NAS.
Access Control List is a List of Addresses that you allow or deny access to resources depending on several conditions.
In Qnap NAS, there is some kind of Access List Control that comes with the QTS system.
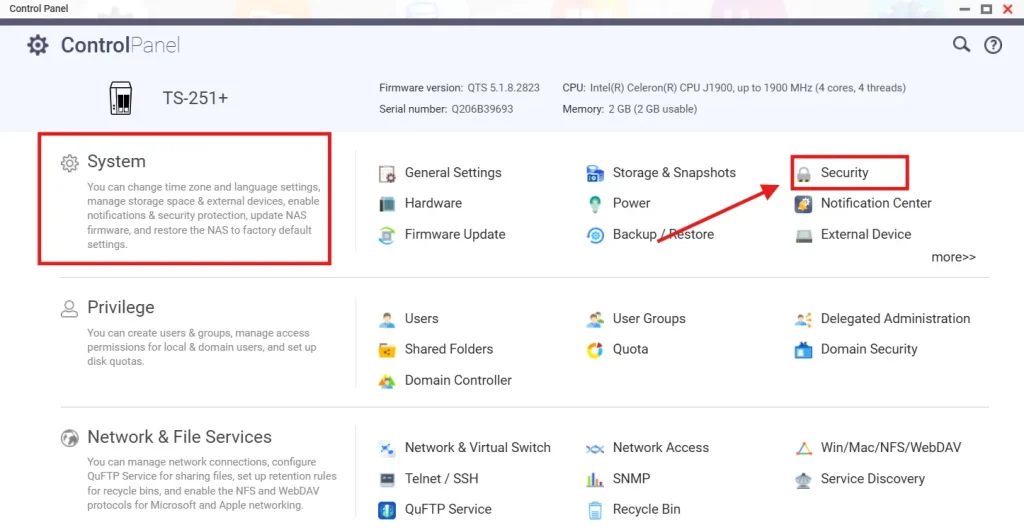
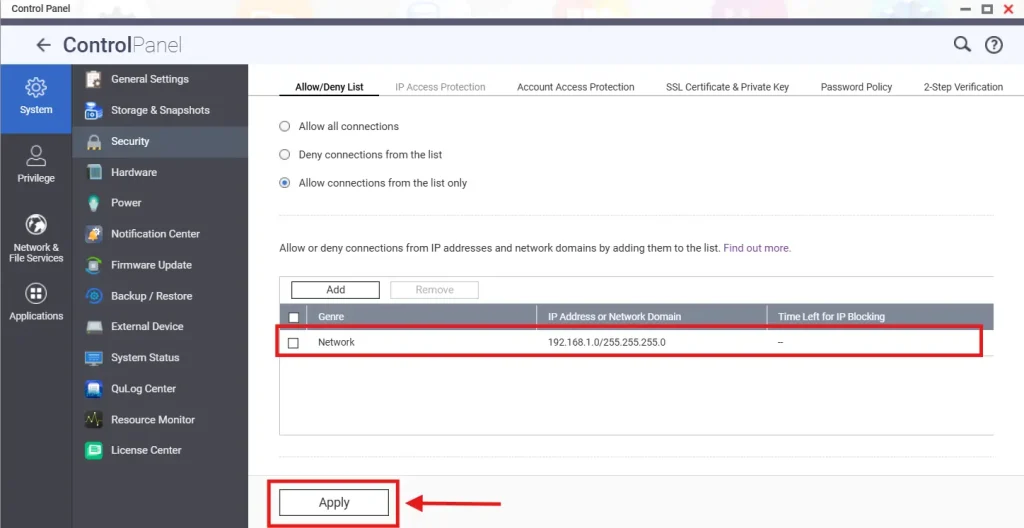
To use it, Open Your Control Panel, then head to the Section “System” >> “Security”:
Next, in the “Allow/Deny List” tab, then choose “Allow Connections from the list only”, this option will allow connection from the IP Addresses that you add to the list, and deny others:
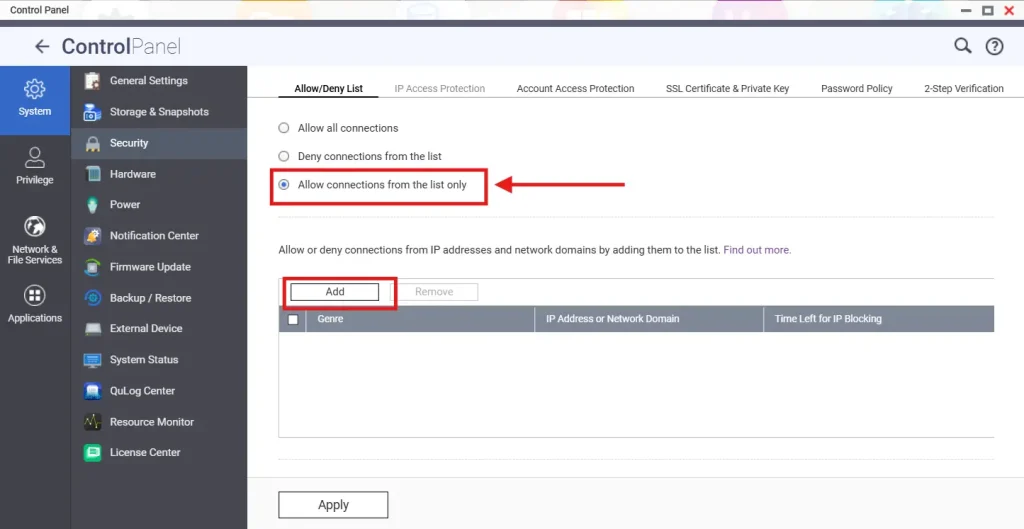
Here you can add your Local Network, or one IP Address, or IP Range.
I will be adding a local network:

Review you settings, then click “Apply”:
Additionally, you can also Enforce 2-Step Verification for Users, and Change the Password Policy.
5) Keep your Network Attached Storage Updated:
You should Always Update Your NAS firmware when there are updates available, and keep your applications updated.
Especially, the Antivirus Application you are using, should be updated always.
This rule also applied to any network device or workstation (Router, Switches, Desktops, Firewalls, etc.. )
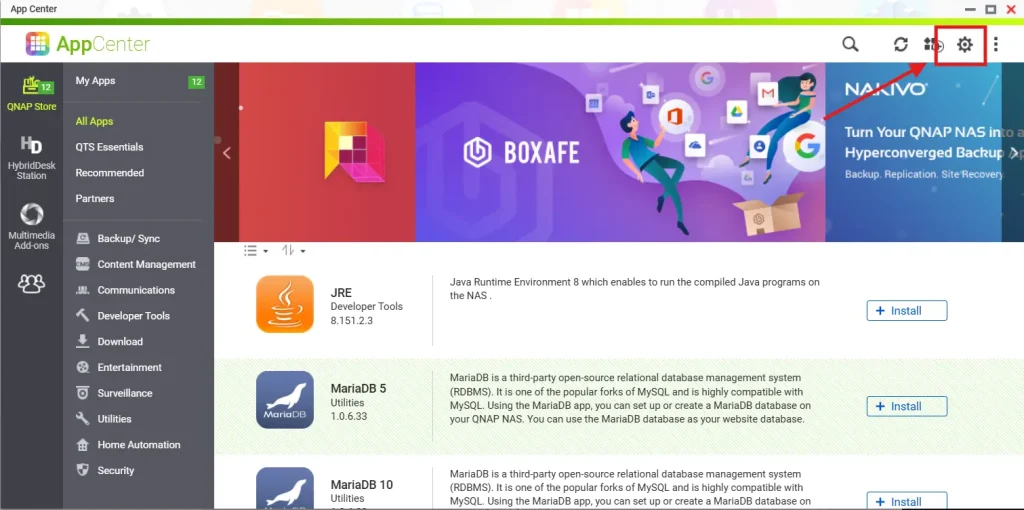
If you know that you will forget to check your NAS for Updates, you can enable automatic updates on your NAS:
On Qnap App Center, open the setting by clicking on the icon:
Next, head to “Update” tab, then make make the settings as below,
Click “Apply”:

For the Firmware, head to Control Panel >> “Firmware Update”
Make sure you choose the option “Automatically install the latest updates”:
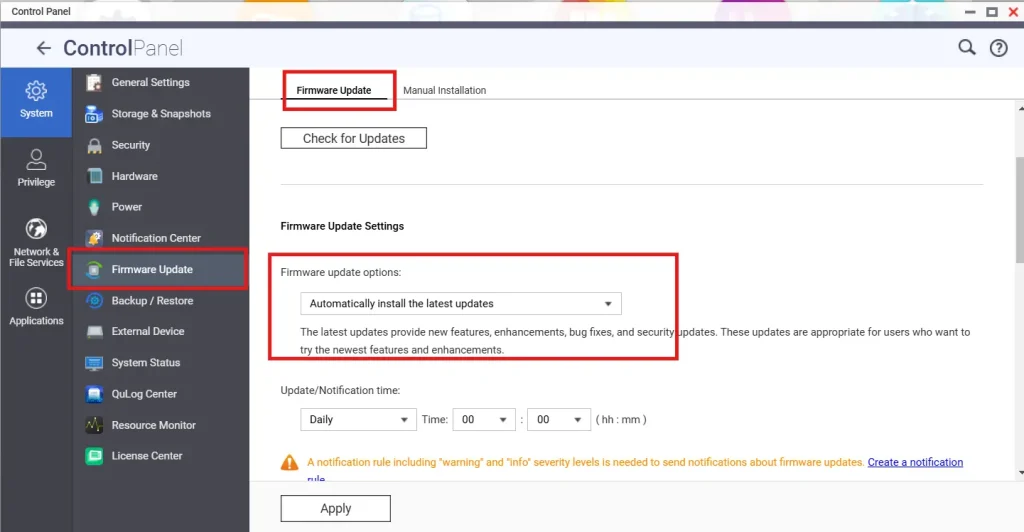
* Keep your NAS Connected to the internet in order for this to work.
Conclusion:
In this guide, We discussed several ways to enhance the security of Network Attached Storage.
As The Security of the NAS is an important factor to establish a robust Storage Solution, Along with automated backup of the data on the NAS to External Storage or Cloud Storage.
Following these steps, you will be able to take control over your NAS.
To read more about Enhancing your NAS Perofrmance, Chack NAS Perfromance Guide


